 April 2, 2009
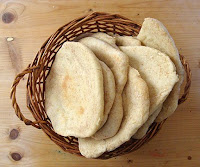
I am so excited to share these recipes!! Hmmm good! The Pita recipe scores 10 out of 10! It was surprisingly easy and incredibly good!
I made up this filling last month because I wanted to use my avocados before they got old. I love avocados! I've been eating them a lot more frequently since my scary gallstone episode back in January -- avocados were on the "good list."
 Michelle's Black Bean Avocado Pita Filling
1 can of black beans, rinsed well
1/2 can of corn, rinsed
2 ripe avocados, diced large
2 roma tomatoes, diced fine
2 spring onions, sliced small
1/4 c. cilantro, chopped fine
2 garlic cloves, minced
1/4 of a lemon's juice
1/2 of a small lime's juice
salt and pepper to taste
Stuff in some green leaf lettuce first for a more salady experience. Add a dollop of sour cream or ranch dressing, too, if you like!
 Pita Bread Recipe (from mideastfood.about.com)
Ingredients:
- 1 package of yeast, or quick rising yeast
- 1/2 c. warm water
- 3 c. all purpose flour
- 1 1/4 tsp. salt
- 1 tsp. granulated sugar
- 1 c. lukewarm water
Preparation:
Dissolve yeast in 1/2 cup of warm water. Add sugar and stir until dissolved. Let sit for 10-15 minutes until water is frothy.Combine flour and salt in large bowl.
Make a small depression in the middle of flour and pour yeast water in depression.
Slowly add 1 cup of warm water, and stir with wooden spoon or rubber spatula until elastic.
Place dough on floured surface and knead for 10-15 minutes, adding a little flour as needed. When the dough is no longer sticky and is smooth and elastic, it has been successfully kneaded. (Key to good pita!)
Coat large bowl with vegetable oil and place dough in bowl. Turn dough upside down so all of the dough is coated.
Allow to sit in a warm place for about 2 hours, or until it has doubled in size.
Once doubled, roll out in a rope, and divide into 10-12 balls. Place balls on floured surface. Let sit covered for 10 minutes. Preheat oven to 500 deg F. and make sure rack is at the very bottom of oven. Be sure to preheat your baking sheets also. (You will probably need three. You can't reuse during baking, the next batch of pitas will stick to the pan.)
Roll out each ball of dough with a rolling pin into circles. Each should be about 5-6 inches across and 1/4 inch thick.
Bake each batch of circles for 4 minutes until the bread puffs up. Turn over and bake for 2 minutes.
Remove each pita with a spatula. Use spatula and gently push down puff and release steam. Immediately place in storage bags.
Storing Pita Bread
Pita bread can be stored for up to a week in a pantry or bread box, and up to a month in the freezer. Be sure to use freezer bags when storing in the freezer.

2 comments:
Bless you for your recipes! I was just about to email you for some good recipes (esp. meatless ones), and remembered your blog had recipes. Thank you!! If you have any more good meatless ones, I'd love to have them. :)
Also, what is a "spring onion"? Is that like a green onion?
You're welcome! I've been very behind this summer, hopefully I'll get a recipe posted tonight!
Yes, spring onions and green onions are the same thing. I think it just depends on when they're picked. I'm never sure which name to use!
Post a Comment